Making one
Step by step, with the two decisions that are hard to change later.
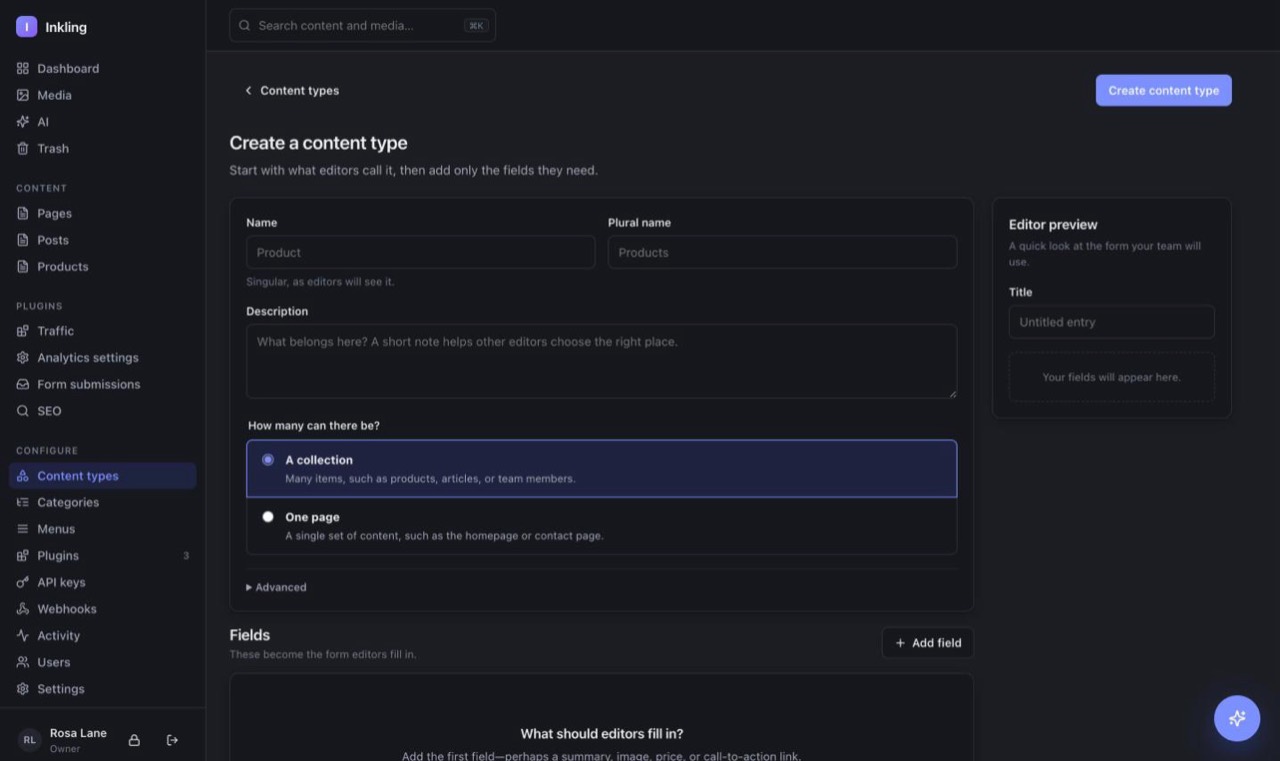
Go to Content types under Advanced setup and press New content type.
- Name it as your team would say it. “Product”, singular. The plural is filled in for you and you can correct it.
- Write a description. One line about what belongs here. Your colleagues see it, and it settles arguments.
- Choose collection or one page. See the previous lesson.
- Add the fields. Press Add field for each thing this kind of content needs. A preview of the form appears beside you as you go.
The two things to get right
Under Advanced there is an API name. That is the name your website uses for this type behind the scenes, and it cannot be changed once entries exist — every site reading it would break. The label above can be renamed whenever you like; this one is close to permanent.
There is also a Live page URL. Fill it in with the address pattern where this content appears on your real site — something like https://yoursite.com/blog/{slug}. Do it and the View live button in the editor opens the actual page instead of guessing.